ImageMagick: palindromic years
This post explains how to create a picture of palindromic years.
Content
In fact, I want to automatically create a picture of a list of dates which have a palindromic format: in other words, the digit sequence of the year is the same from left to right and from right to left: e.g. 22, 545, 1331. Moreover, I want to mark the years which are prime numbers.
1. Introduction
But first of all, I show you how to create a picture from a number. You can do so by using ImageMagick. The following command creates a picture containing the text 1331. The command convert has a number of arguments (font selection and point size) and the text is created via the label option. The result is saved in a png file (see Fig. 1):
$ convert -font Times-New-Roman -pointsize 72 label:1331 number-A.png

Fig. 1: number-A.png
You can also present the same one-line command on different lines (using a backslash at the end of each line). In this way, options or arguments are easier to read. This is especially useful when using lots of options.
 $ convert \
      -font Times-New-Roman \
      -pointsize 72 \
      label:1331 number-A.png
You can add other parameters, such as background color, stroke width, etc., and create, for example, a jpg file. The result of the following command is shown in Figure 2.
 $ convert -background DarkSlateBlue \
     -strokewidth 2 -stroke turquoise1 \
     -font Times-New-Roman \
     -pointsize 72 \
     -density 90 label:XIX number-B.jpg

Fig. 2: number-B.jpg
The density option in the previous command is used to specify the image resolution. It is useful for vector images, but less important for our example in jpg format.
The final example shows how to add a border and border colour to the picture, here saved as gif file:
 $ convert -bordercolor red -border 5 \
           -font Times-New-Roman \
           -pointsize 72 \
           -density 90 label:33 number-C.gif
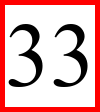
Fig. 3: number-C.gif
You can now group all the number-images with the montage command and create a new image containing all three images:
$ montage number-* all-numbers.png
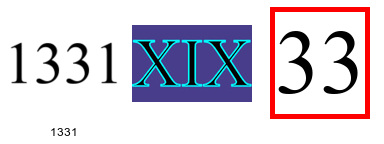
Fig. 4: all-numbers.png
Note that montage will automatically visualize the title if the selected picture is in PNG format, which is the case for number-A.png only. You can avoid the visualization by adding the option +set label.
The montage command and its options are very well illustrated in the article How To Create A Montage From Images In Linux.
Note also that the numbers shown in the montage, have different sizes, where the image for 33 is the biggest of the three numbers. We can visualize the sizes by modifying the label, adding width and height (%wx%h). Moreover, we add a background color to the montage:
 $ montage -set label '%wx%h' \
           -background grey \
           number-* all-numbers-v2.png
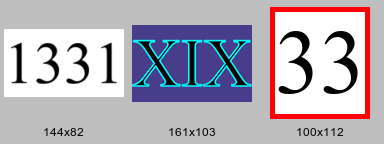
Fig. 5: all-numbers-v2.png
We will see later how to optimize the size of all pictures.
By the way, note that Roman number XIX is a palindromic number, but the Arabic number equivalent 19 is not. A similar situation is the case of XX and XXX when compared to 20 and 30.
In the next sections we will see how to collect a set of palindromic years. This is followed by a section on how to check whether the selected years are prime numbers or not.
2. Palindromic years
Suppose you want to select all palindromic years from the year 10 to 2000, you can do so by writing the following bash script, which uses the rev command to reverse a string.
The bash script loops over a sequence from 10 to 2000. For each year (anno) the reverted string (annoREV) is compared with the original year. If both strings are equal, the year is echoed to the screen. All other years are ignored. The list of years is stored in the text file list-palindrome-anno.txt.
  for i in $( seq 10 2000);
  do
    anno=$i
    annoREV=$( echo $anno | rev )
    if [ "$anno" == "$annoREV" ]; then
      echo $anno
    fi
  done > list-palindrome-anno.txt
The word count command (wc) with option -l prints the number of lines in the file list-palindrome-anno.txt, and thus shows that there are 109 valid palindromic years:
  $ wc -l list-palindrome-anno.txt
  109 list-palindrome-anno.txt
In order to avoid listing 109 lines on screen, we can use the following script to show the years grouped by 10 numbers, using the pr and expand commands:
  $ pr -t -l 10 -6 list-palindrome-anno.txt |
  expand |
  awk 'NR % 11 == 0 { print "" } { print }'

  11          111         212         313         414         515
  22          121         222         323         424         525
  33          131         232         333         434         535
  44          141         242         343         444         545
  55          151         252         353         454         555
  66          161         262         363         464         565
  77          171         272         373         474         575
  88          181         282         383         484         585
  99          191         292         393         494         595
  101         202         303         404         505         606

  616         707         787         868         949         1221
  626         717         797         878         959         1331
  636         727         808         888         969         1441
  646         737         818         898         979         1551
  656         747         828         909         989         1661
  666         757         838         919         999         1771
  676         767         848         929         1001        1881
  686         777         858         939         1111        1991
  696
3. Prime numbers
After selecting the palindromic years, I also want to know which years in this set are prime numbers. Therefore, I use a perl script check_prime.pl which requires one number as input and which returns 1 when the number is a prime, and 0 otherwise.
The following bash script sends the years in list-palindrome-anno.txt to a bash loop, where each year is checked for being a prime number or not. The year and the check_prime.pl result is stored in a new file list-palindrome-anno-v2.txt:
  cat list-palindrome-anno.txt |
  while read f;
  do
    res=$( echo $f | check_prime.pl ) ;
    echo $f $res;
  done > list-palindrome-anno-v2.txt
The new output contains one line records, having two fields (the palindromic year and the prime indicator). The first 10 lines of the output show that only the years 11 and 101 are prime numbers:
  $ head list-palindrome-anno-v2.txt
  11 1
  22 0
  33 0
  44 0
  55 0
  66 0
  77 0
  88 0
  99 0
  101 1
The following script filters all lines ending in 1 (indicating prime numbers), which returns 16 prime numbers:
  $ grep '1$' list-palindrome-anno-v2.txt
  11 1
  101 1
  131 1
  151 1
  181 1
  191 1
  313 1
  353 1
  373 1
  383 1
  727 1
  757 1
  787 1
  797 1
  919 1
  929 1
Now we have the required palindromic years between the years 10 and 2000, and an indication of whether the year is a prime number or not.
4. Create images
The palindromic years and the prime number indication are the ingredients for creating and formating the number images and putting them all together into one montage image.
Since the number images are only required for building the montage, those images can be stored in a temporary folder. I use a variable TEMP_DIR and create the folder with the mkdir command:
  TEMP_DIR=/tmp/palindrome
  mkdir -p $TEMP_DIR
The following script is used to create all the images.
       1 cat list-palindrome-anno-v2.txt |
       2 head -30 |
       3 shuf |
       4 while read f p;
       5 do
       6   echo === $f;
       7   if [ "$p" == "1" ]; then
       8       BACKGROUND=SkyBlue
       9   else
      10       BACKGROUND=LightSteelBlue1
      11   fi
      12   let COUNTER++;
      13   f2=$( printf "%4.4d_%s" $COUNTER $f) ;
      14   convert \
      15      -font Times-New-Roman \
      16      -pointsize 120 \
      17      -size 340x150 \
      18      -background $BACKGROUND \
      19      -gravity center \
      20      -bordercolor red -border 5 \
      21      -density 90 label:$f $TEMP_DIR/palindrome-$f2.png;
      22 done
The script consists of two parts. The first part (lines 1-3) is only required to adapt the order of the number images. In this example, we want to have the number images in random order. The second part (lines 4-22) is a loop over all the image numbers. For each image number in the loop, the number is converted into an image (lines 14-21). In the initial part of the loop (lines 6-13), some variables are initialised and the basic part of the output file name is created.
Here follow the details of the script. At the beginning, we print the content of the input file list-palindrome-anno-v2.txt (see line 1). The output of the cat command is sent via the pipe symbol (|) to the next command (line 2), where only 30 lines are being read. This is only done for testing purposes. If everything runs fine, you can place a comment mark (the hash symbol), so that the head command in line 2 is ignored.
The output is then sent further to the shuf command, where all lines of the input file are shuffled in random order. This step is required because we want all number images in random order.
Then comes the main while loop, where the content of the do-done block (lines 6-21) is executed for each image number read from the input file. On line 4 we read two variables from the present input line: f is the image number and p is the parameter indicating whether the selected image number is a prime number or not. In line 6, we simply echo or print the selected image number to screen, thus creating a minimal form of feedback. Next we initialise the variable BACKGROUND (lines 7-11, based on the outcome of $p: prime numbers will get a SkyBlue background; the other numbers get a LightSteelBlue1 background colour. For each image number read, we increment a counter on line 12. The incremented COUNTER is used to create the basic part of the output file f2.
Suppose, the first five image numbers from the randomized set are:
  111
  979
  777
  454
  101
In that case, line 13 of the script will create the following basic file names, where the first part is a sequential number (based on the COUNTER variable) and the the second part is the selected image number:
  0001_111
  0002_979
  0003_777
  0004_454
  0005_101
Then comes the convert command which is the actual command to create an image. This command has a number of options. which are spread over 8 lines (14-21). The background option (line 18) uses the content of variable BACKGROUND. The gravity option places the number in the center of the image canvas. The output file is a combination of the $f2 (defined on line 13) preceded by $TEMP_DIR/palindrome- and followed by .png. In this way all images are saved in the $TEMP_DIR using a filename containing a sequential number, based on the randomized order created by shuf. The previous example set of five randomized numbers will be stored under the following names:
  /tmp/palindrome-palindrome-0001_111.png
  /tmp/palindrome-palindrome-0002_979.png
  /tmp/palindrome-palindrome-0003_777.png
  /tmp/palindrome-palindrome-0004_454.png
  /tmp/palindrome-palindrome-0005_101.png
5. Montage
Now we can create a montage of all images. For the moment, we will do so for the testing set of 30 images only.
First of all we create a montage, using the following command:
  montage -page 80x80 \
          +polaroid \
          +set label \
          -geometry '100x100>+2+2' \
          $TEMP_DIR/*.png $TEMP_DIR/montage2.png
We create a montage of all the png files found in the TEMP_DIR folder. The output is stored in the file montage2.png. Note that we send the output file also to the TEMP_DIR folder.
Here follows a brief explanation of the options used:
+page 80x80: this option is used to define the canvas. It can be useful when you convert thepngfile topdf.+polaroid: creates a polaroid effect: the images are slightly slanted+set label: this option removes the labels underneath each picture-geometry '100x100>+2+2': geometry defines the size of each image: each image will be resized into a 100x100 thumbnail having 2 pixels of space on the left and right of the image and the same amount of pixels above and below. The arrow>is a resize option: it is used to shrink only if the the size of the image is greater than the size given. The montage of the 30 images is shown in Figure 5.
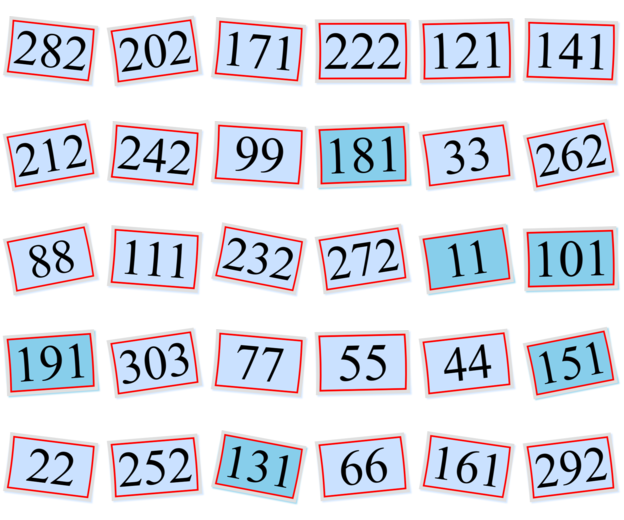
Fig. 6: montage2-30.png
We can add a watermark to the figure. We first create the watermark logo (containging the text: palindrome-anno) with the following command:
  convert -size 900x250 xc:transparent \
      -pointsize 120 -font Times-New-Roman-Bold \
      -gravity center \
      -annotate +0+0 "palindrome-anno" logo_palindrome.png
We can now fuse the watermark picture with the image montage2.png
Note that the watermark is too wide for the present montage containing only 30 images. But the size is appropriate when we create the final image, containing 109 images.
  composite -dissolve 15% \
     -bordercolor white -border 30 \
     -gravity center \
     -quality 100 \
     logo_palindrome.png $TEMP_DIR/montage2.png palindrome-year-30.png
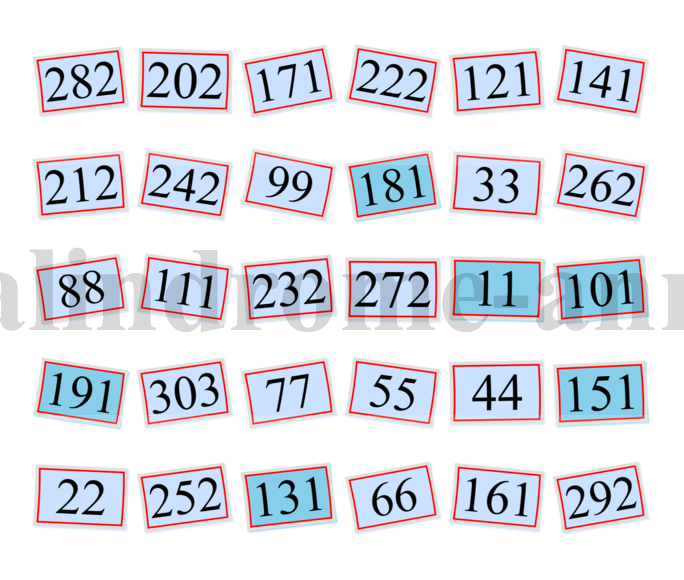
Fig. 7: palindrome-year-30.png
To finish the image, we add a border to the montage. We use the command mogrify which has the same features as the convert command. The big difference is that input and output files are the same: in other words, the data are overwritten. In this case, there is no problem. We will execute twice the mogrify command, adding a black and a white border of different sizes:
  mogrify -bordercolor black -border 2 palindrome-year-30.png
  mogrify -bordercolor white -border 50 palindrome-year-30.png
The final image for the 30 palindrome numbers is
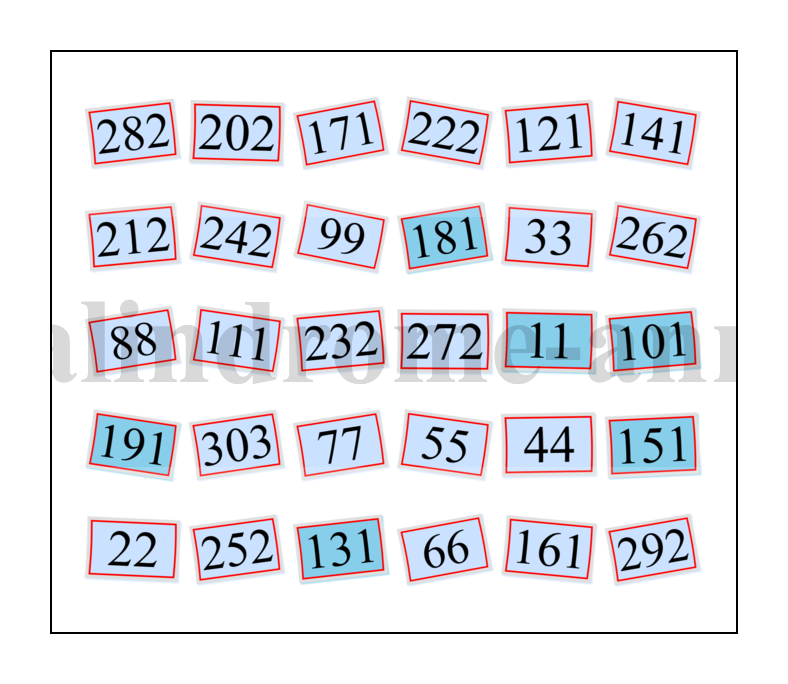
Fig. 8: palindrome-year-30.png
If you want to build a montage of all the 109 images, you only need to comment out the head filter, by placing a hash mark in front of the command (i.e. # head -30 |) and execute the script again. The result is shown in Figure 9.
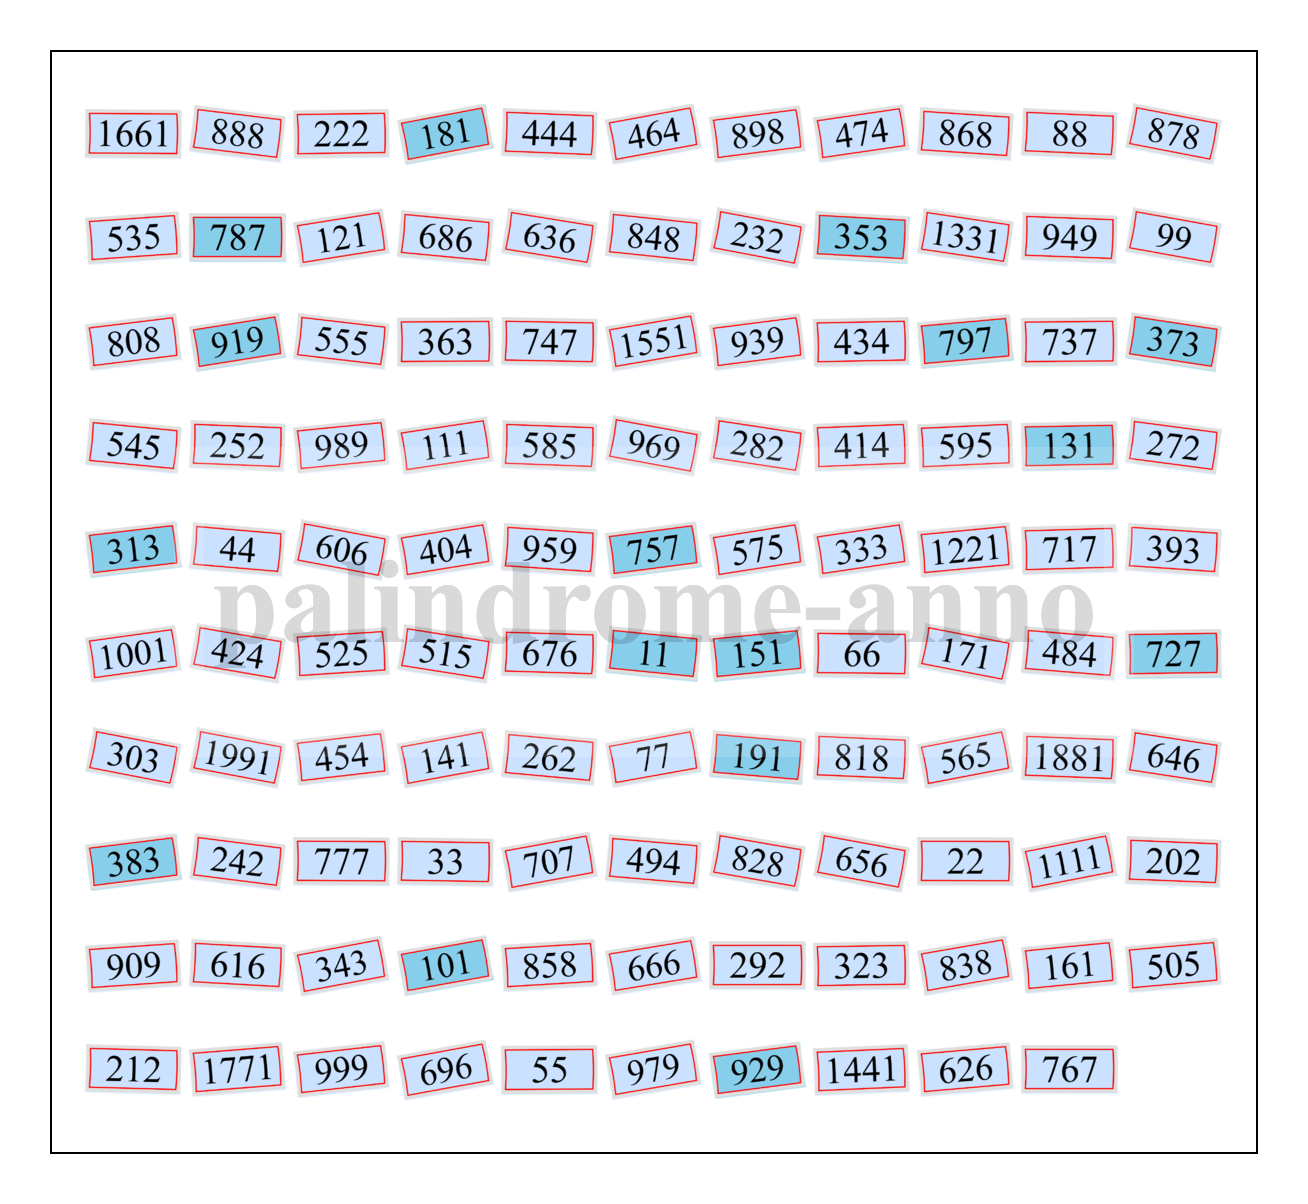
Fig. 9: palindrome-year.png
6. Scripting
The above sections explained step by step how you can create an ImageMagick picture of a set of palindromic years, using a set of bash scripts. On the basis of these steps, the script crea-palindrome-year.sh is an example of how you can run the different scripts in one command.
Tags: ImageMagick, palindrome, rev, reverse, shuf, shuffle, random, permutation